Step 1:
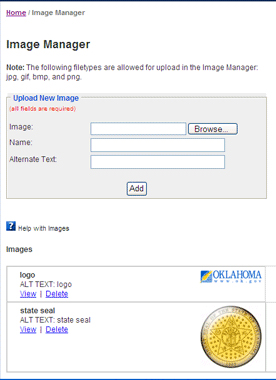
Select the "Browse" button. This will open a window which allows you to find the image on your computer that you would like to add.
Step 2:
Find and select the image on your computer that you want to add, then select the "Open" button.
Step 3:
In the "Name" box, type a name for the image. Choose a name that gives an obvious description of the image for future recognition.
Step 4:
In the "Alternate Text" box, type a short description of the image. Example: "A picture of an American Bullfrog." This description will show up when a visitor holds their cursor over the image.
Step 5:
Select the "Add" button. The server will now add your image to be stored in your "Image Manager." As soon as it has completed uploading your image, the name of your image will appear below in the list of "Images." Feel free to select the link of the image you just added to preview it.
Please Note: You can only add one image at a time.
How to delete an image
Click the "Delete" link next to the image you would like to delete. Then, click "Yes" on the confirmation screen.


 Email
Email
 Print
Print