|
Skip Nav Skip to Search |
FAQs | Contact | Site Index |
User's Guide
|
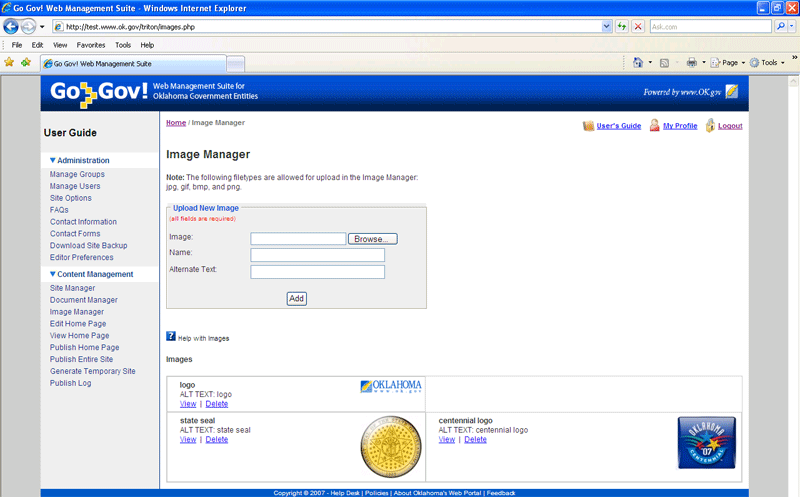
Image Manager
The Image Manager is where images are stored. It allows you to add and remove images to be placed on your agency's Web site. The fields at the top are utilized to add images to the Image Manager. In order to place an image on a Web page, you must first add them here. Images that have already been added to your Web site are listed at the bottom under the title 'Images'. You can select the blue underlined text to view the image. How to add an image Step 1: Step 2: Step 3: Step 4: Step 5: How to delete an image
Click the 'Delete' link next to the image you would like to delete. Then, click 'Yes' on the confirmation screen.
|
||
| Copyright ©
State of Oklahoma OK.gov Help Desk | OK.gov Policies | About Oklahoma's Web Portal | Feedback |
|||